Giving your home a fresh look doesn’t always mean embarking on a major remodel. Sometimes, simple improvements like refinishing metal hardware or fixtures can make a world of difference. Whether it’s the doorknobs, drawer pulls, or light fixtures, these small details can significantly impact the overall aesthetic of your space. However, over time, they can become worn, tarnished, or outdated. That’s where we step in. Impactful Construction Group, a CA licensed contractor based in Woodland Hills, is here with a comprehensive guide that will walk you through the process of refinishing metal hardware or fixtures, helping you create an impressive upgrade for your home, serving the entire Los Angeles area.
Refinishing is an economical and environmentally friendly option that breathes new life into your existing hardware. It’s also a DIY-friendly project that homeowners can undertake with a bit of guidance. But, if you’re unsure or would rather spend your time on other tasks, remember that our experienced team at Impactful Construction Group is always ready to assist.
This guide will not only provide step-by-step instructions, but also practical tips, actionable advice, and examples from our projects in neighborhoods throughout the San Fernando Valley area, including North Hollywood, Van Nuys, Reseda, Sherman Oaks, and Studio City. So, let’s dive in and get started!
Table of Contents
ToggleMaterials and Tools Needed
The first step in any DIY project is gathering all the necessary materials and tools. Having everything on hand before you start ensures a smooth and efficient process. Here’s what you’ll need:
- Protective gloves
- Respirator or face mask
- Drop cloth or newspapers
- Paint stripper
- Steel wool or sandpaper
- Metal primer
- Metallic spray paint
- Clear topcoat
- Screwdrivers or wrenches (for removing hardware)
These items can be found at any local hardware store. If you’re unsure about which products to choose, our experienced team at Impactful Construction Group can provide recommendations based on the type of metal and the desired finish.
Removing the Hardware
The next step is to remove the hardware from its place. It’s crucial to do this carefully to avoid any damage to the surrounding areas. Use a screwdriver or wrench to loosen and remove screws or bolts. If the hardware is stuck, a bit of penetrating oil can help loosen it. Remember to keep all screws or bolts in a safe place, as you’ll need them for reinstallation.
Before moving on to the next step, make sure to clean the hardware. Use warm soapy water to remove any dirt or grease. Rinse thoroughly and dry completely.
Stripping the Old Finish
Once the hardware is clean and dry, it’s time to strip the old finish. Safety is paramount during this step. Ensure you’re working in a well-ventilated area and wearing protective gloves and a respirator or face mask. Apply a generous amount of paint stripper to the hardware and let it sit according to the manufacturer’s instructions. Use steel wool or sandpaper to scrub off the old finish.
After the old finish is removed, rinse the hardware thoroughly and dry it. The hardware should now be ready for a new finish.
Applying the New Finish
Now comes the exciting part—applying the new finish. Start by applying a thin coat of metal primer. This will help the paint adhere better and result in a smoother finish. Allow the primer to dry completely before moving on to the next step.
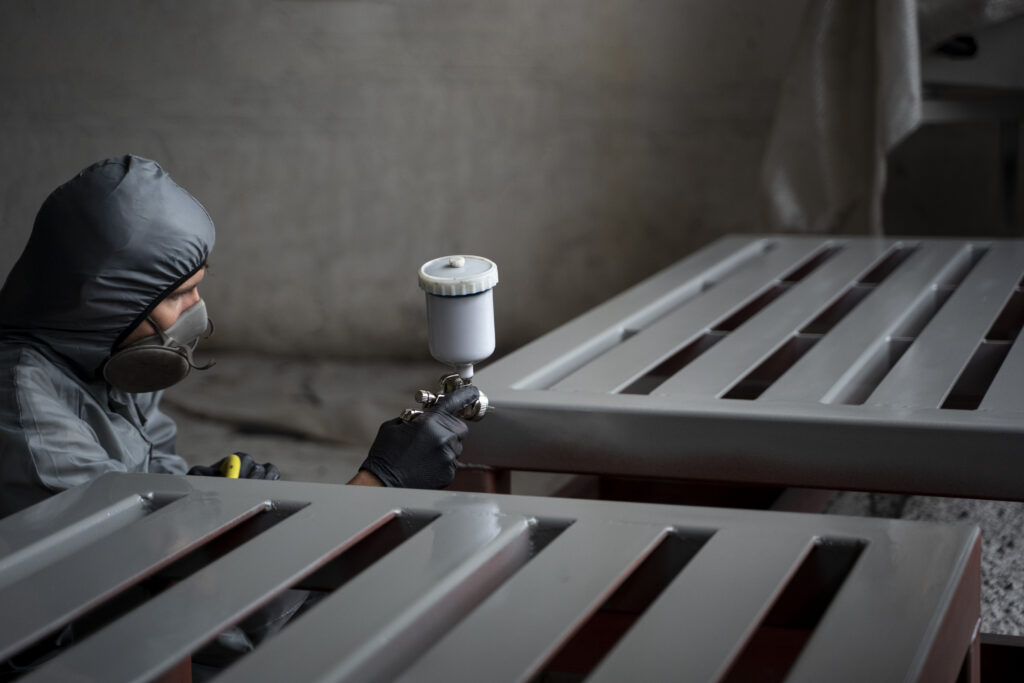
Once the primer is dry, apply the metallic spray paint. Hold the can about 10-12 inches from the surface and use smooth, even strokes. It’s better to apply several thin coats rather than one thick one. Allow each coat to dry before applying the next.
After the final coat of paint is dry, seal your work with a clear topcoat. This will protect the paint and give your hardware a professional-looking finish. Allow the topcoat to dry completely before reattaching the hardware.
Reinstalling the Hardware
With the hardware refinished and fully dried, it’s time to reinstall. Use the screws or bolts you set aside earlier to attach the hardware back in its original place. Take care not to scratch your newly refinished hardware during this process.
And there you have it! With patience and attention to detail, you can significantly enhance your home’s aesthetic by refinishing your metal hardware or fixtures.
FAQs
Here are some frequently asked questions we encounter at our Woodland Hills based company, Impactful Construction Group:
- Can all types of metal hardware be refinished? Most metal hardware can be refinished, but there are exceptions. Always check with a professional if you’re unsure.
- Can I change the color of my hardware? Absolutely! Metallic spray paint comes in a variety of colors, allowing you to customize your hardware to match your home’s decor.
- How long does it take for the new finish to dry? Drying times can vary based on the type of paint and environmental conditions. Always check the manufacturer’s instructions for specific drying times.
- What if I’m not comfortable doing this myself? That’s where we come in! Our experienced team at Impactful Construction Group can handle all your refinishing needs. Just give us a call at (323) 591-3717.
In conclusion, refinishing metal hardware or fixtures is a cost-effective way to update the look of your home. Whether you’re aiming for a modern, rustic, or vintage look, this DIY project can make a dramatic difference. However, if DIY isn’t your thing, or if you’d rather spend your time on other tasks, remember that our team at Impactful Construction Group is always here to help.
Ready to transform your space? Trust the experts at Impactful Construction Group. As CA licensed contractors based in Woodland Hills, we serve the entire Los Angeles area with premium construction and remodeling services. Call or text (323) 591-3717 for a free consultation and let’s bring your vision to life.

